My setup and computer ordeals
Since I started this blog, I’ve been doing HackTheBox CTFs like crazy, as much as possible really. And among all the questions I get (that is to say, zero) there’s one that absolutely never comes up which is: “What’s your setup for doing CTFs?” And we’re going to answer that today!
My stories Link to heading
I’m part of the smartphone generation, so when I got my first computer in 2017, I didn’t really know what to do with it and didn’t have the reflex to use it at all. I ended up installing some sketchy thing on it and had the impression it was running super slow, I was sure it needed to be fixed so my parents called over a “friend who knows his way around computers” who declared that the computer was done for but that he’d be happy to take it off our hands, what luck!

A year later I enter prep school and there they ask us to have a laptop because we’re going to code for the first time. Again we embark on a whole ordeal to find me the ideal computer, and we land on an Asus machine for 1000€ or more (so very, very expensive from my perspective at the time) with lots of RAM, core i7, integrated GPU, etc. I remember the conversations with the LDLC guys: “Mmmmh… Yes you’re right, I MIGHT do 3D so better put in plenty of power…”
Three years later I still have this computer that I’m getting better and better at using (the pandemic certainly helped on that front) and I start getting really interested in cybersecurity. It’s during this period that I do my first Windows - Linux dual-boot and it wasn’t easy! This has the side effect of making me want to take my computer everywhere all the time, including when I go out partying (to “work” on the trip). And what had to happen happened: the 1000€ computer took a hit during the party. It became unusable right before my internship at Polytechnique Montreal.
Unusable? No, not really. Actually, only the screen doesn’t work. If I plug it into an external screen, I can work on it normally. So I started by making the somewhat risky move of ordering a new screen from the Asus website and changing it myself with my meager DIY skills. As I feared, the problem wasn’t the screen so I had to carefully repackage the 200€ screen in its box (putting the adhesives back and everything) to hopefully get a refund (rest assured I got refunded at the end of the story). I then tried to get the computer repaired at two Montreal shops that both told me it was a motherboard problem and therefore not worth changing (BestBuy still charged me quite a bit for this diagnosis unlike the independent repair guy on the corner).

So I reinvest in a new laptop at 500€ this time, which I still have today and which is my main work tool (the Canadian keyboard is a huge source of confusion for everyone who tries to use it, to my great amusement). So I left my old computer in a closet for a good while until I decided to take it out to make it into a lab, a computer I would use for fun little experiments.
I went through many different phases to set up this lab. I started by removing the screen which was just taking up space for nothing.
- The lab plugged into the screen, standing vertically on my desk while my laptop is sitting normally on my desk. And I alternate between controlling one and the other by switching devices on my Logitech keyboard and mouse.
Completely awful to make these changes of course, especially since if I need to do a task on my normal computer and I need both screens I have to unplug and replug. Plus there’s no copy-paste possible between the two devices which is quite problematic for note-taking. Needless to say I didn’t keep this configuration for long.
- The lab is still sitting on my desk, but this time I’ve installed remote access software on it (which I’ll detail later).
That’s not bad, we solve the control problem and the two screens for my main computer if needed. However, with this new comfort, we become aware of two new problems: I have to press the button on my lab myself to turn it on and this lab still takes up space on my desk. Isn’t there a way to optimize this?
- The ideal setup: my lab is in the same closet as my internet box. It stays always plugged into power and I added a Wake-On-LAN feature to be able to start it remotely.
This solves the two problems mentioned above. Here’s a little glimpse:
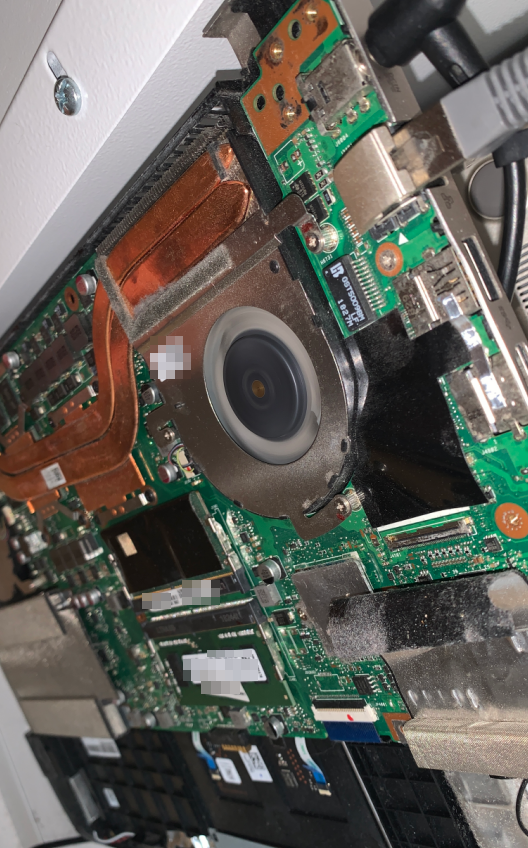
People have quite the reaction when they open my electrical closet haha! I removed the battery because those things can be problematic, and otherwise I also removed the cover to have better airflow for when we launch a hashcat session and it heats up a bit ;)
- The ultimate setup: I acquire a Freebox which allows me to configure many things, notably access to my lab remotely from the internet.
And that’s what I did, to be able to access my lab no matter where I am as long as I have an internet connection!

So here are the 4 main steps I followed to have the setup I have today. Pretty cool right? But now let’s get into a bit more detail.
The technical stuff Link to heading
On my lab, I started by noticing that I actually had two drives, one 250GB and one 1TB. I tested a few different distributions using sometimes one drive sometimes the other, before ending up on Fedora and using Gnome. Then one fine day, for some reason I can’t remember anymore, I told myself it would be a good idea to install Arch Linux instead. By the way, you can go check out my article on how I installed Arch. Once that’s done, you need to set up the remote access software.
I chose FreeRDP which was an obvious choice because initially I was using Windows on my main computer. I recently switched to Debian but I continue to use FreeRDP nonetheless out of habit on one hand, but also because I honestly haven’t found a better alternative (and it’s not for lack of trying).

Installing and configuring FreeRDP on the lab Link to heading
Once Arch Linux is installed on the machine, you need to choose your system environment. Since I was starting to know Gnome well, I told myself I was going to try KDE because, indeed, I’m a bit more comfortable with icons and images and all.
Now, to install FreeRDP:
sudo pacman -Syu
sudo pacman -S xrdp xorgxrdp
For my usage, I need the lab to stay constantly awake, and never go into sleep mode or anything. In the etc/xrdp/xrdp.ini file we add the lines:
max_bpp=32
reconnect_timeout=60
And in the /etc/xrdp/sesman.ini file we add:
IdleTimeLimit=0
Normally, nothing should stop working or go into standby mode.
Configuring KDE Link to heading
So we need to configure FreeRDP so it understands it needs to launch KDE. So we add:
echo "exec startplasma-x11" > ~/.xinitrc
We also need to customize the startwm.sh script and for that I found this script ready-made, which works pretty well.
Configuring GDM Link to heading
GDM means Gnome Desktop Manager, and it’s the screen that appears after we restart the computer that asks us to choose a user and enter the password. And the idea is to tell it that we don’t want to see it because we’ll specify the user and password when connecting from the original machine.
sudo echo "auth optional pam_exec.so /usr/lib/gdm-runtime-config setuser" >> /etc/pam.d/gdm-password
sudo echo "auth optional pam_exec.so /usr/lib/gdm-runtime-config setuser" >> /etc/pam.d/xrdp-sesman
The above parameters were suggested to me by an AI, I wouldn’t have thought of it myself, especially since when I look at the arch wiki on this subject I don’t find mention of this line but oh well.
It’s also highly recommended to disable the Wayland option:
sudo nano /etc/gdm/custom.conf

[daemon]
<SNIP>
WaylandEnable=false
<SNIP>
And there you go, normally you shouldn’t be bothered anymore, well I say that but I’m generally bothered by the keyring for scanning wifi networks but hey, it’s not too annoying since my lab is plugged in via ethernet. So I just click on “Cancel” on a window every time I start my computer.
Firewall Link to heading
And finally to finish our FreeRDP installation, we need to tell our firewall to let RDP traffic through on the port the server runs on, which by default is 3389.
sudo ufw allow 3389
Activation Link to heading
And there you go, normally FreeRDP is well configured, we’ve configured KDE, GDM as well as our firewall for everything to work, let’s now start the services:
sudo systemctl enable --now xrdp
sudo systemctl enable --now xrdp-sesman
Normally everything’s running smoothly!
Configuring Wake-On-LAN Link to heading
To do this, we can simply follow the instructions from the Arch Wiki.
sudo ethtool -s eth0 wol g
Here, Wake-On-LAN is activated, all that’s left is to make it permanent with systemd:
sudo nano /etc/systemd/system/wol@.service
We write:
[Unit]
Description=Wake-on-LAN for eth0
Requires=network.target
After=network.target

[Service]
ExecStart=/usr/bin/ethtool -s eth0 wol g
Type=oneshot

[Install]
WantedBy=multi-user.target
And at the next startup we’re pretty sure we can start the lab from the network, notably with the following command on Debian:
wakeonlan -i 172.16.1.2 aa:bb:cc:dd:ee:ff
To adjust with the IP and MAC address of your lab. However, we’ll see in the section right after that we can do it differently to “wake up” our lab.

Configuring the Freebox Link to heading
Now, the fun part! Freeboxes are honestly pretty cool and you can do many things with them. I discover new things every time I tinker with the Freeboxes around me. I think I’m starting to know pretty well how it works and here are tutorials for some of the features.
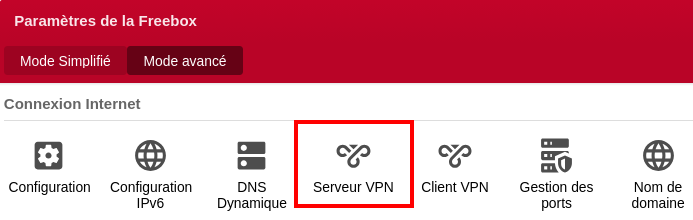
Configuring the VPN server Link to heading
We can also do plenty of other things. Notably transform the Freebox into a VPN server:
We add our user with the connection type (Wireguard):
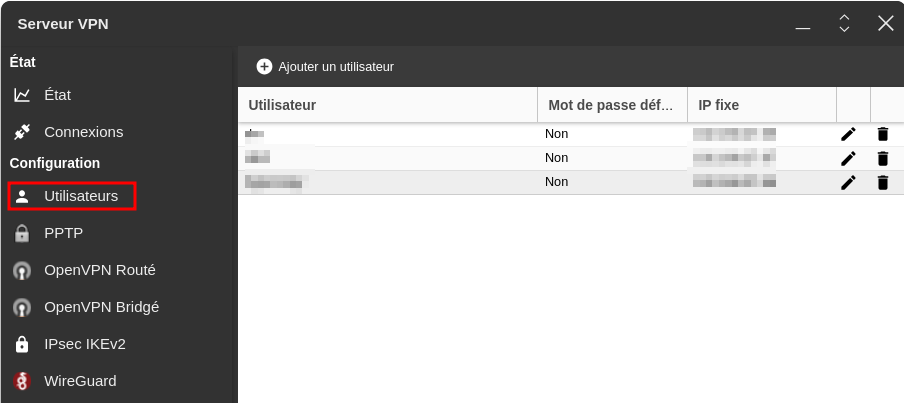
I’m blurring my information obviously.
Then we navigate to Wireguard in the Wireguard menu to download the configuration file:
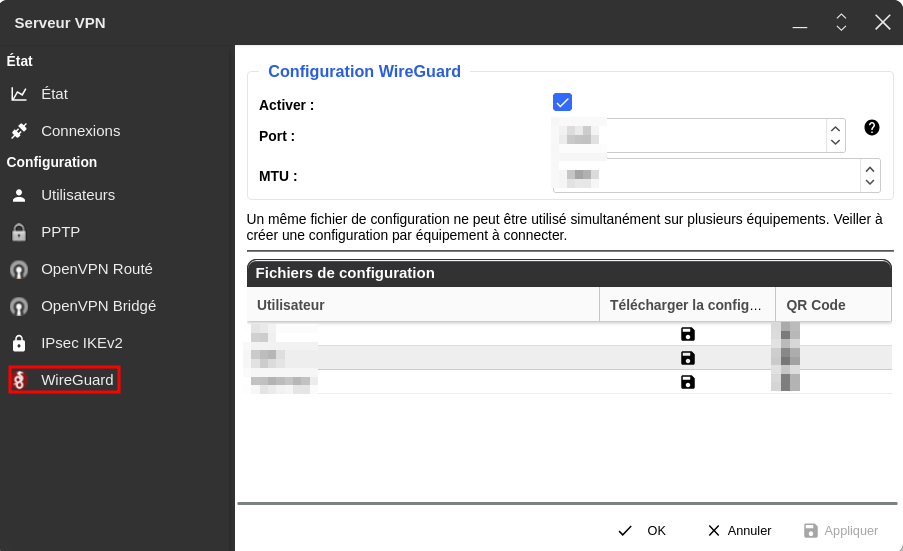
Once we have the configuration file on our computer, we need to download Wireguard and import the configuration file to start the connection. Once the connection is started, we can check our IP address (by looking at our computer’s network settings, or by going to Mon-IP) and especially we can access our Freebox connection portal.
Using Wake-On-LAN to turn on our lab Link to heading
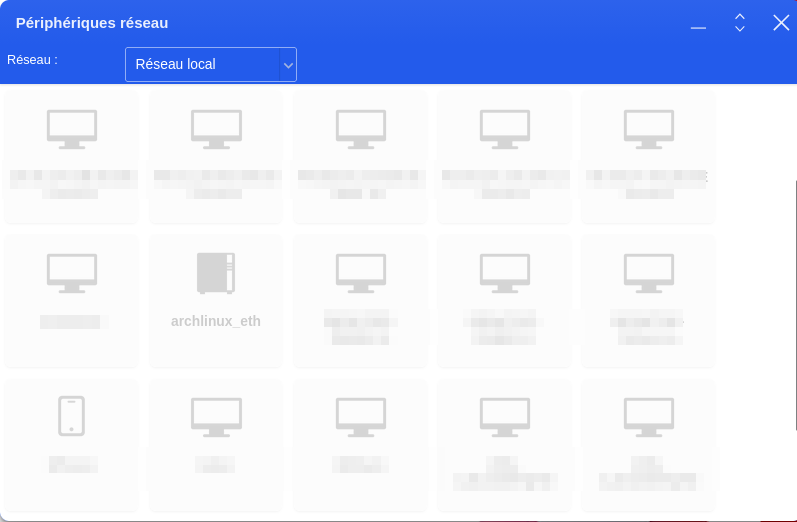
We can then click on “Network devices” to have the list of all devices connected or that once connected to our Freebox and find our lab:
I renamed it archlinux_eth and changed the logo to spot it more quickly. We can right-click on it and send the wake-up packet:
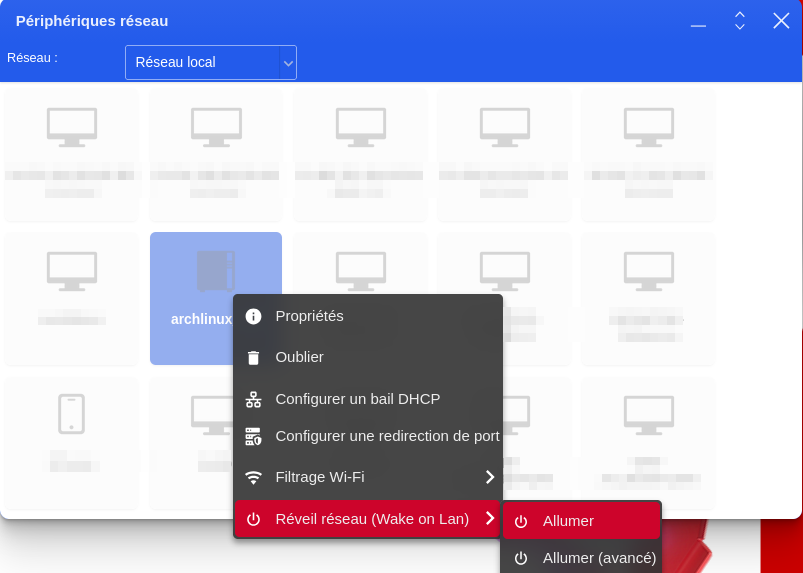
And then we’ll see that after a minute, we see:
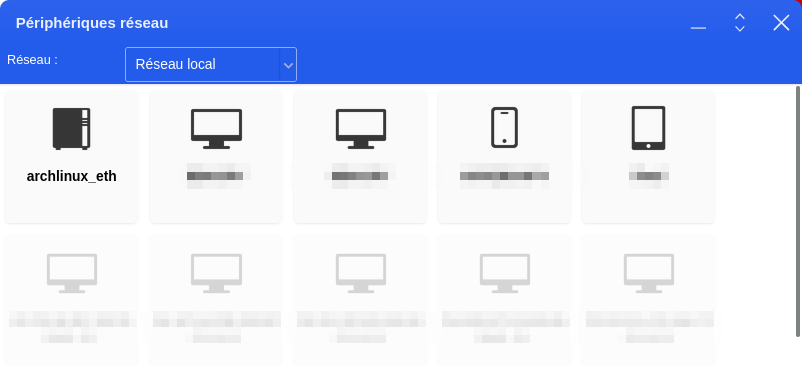
We see it’s not grayed out but in bold which indicates it’s turned on.
Connecting to the lab Link to heading
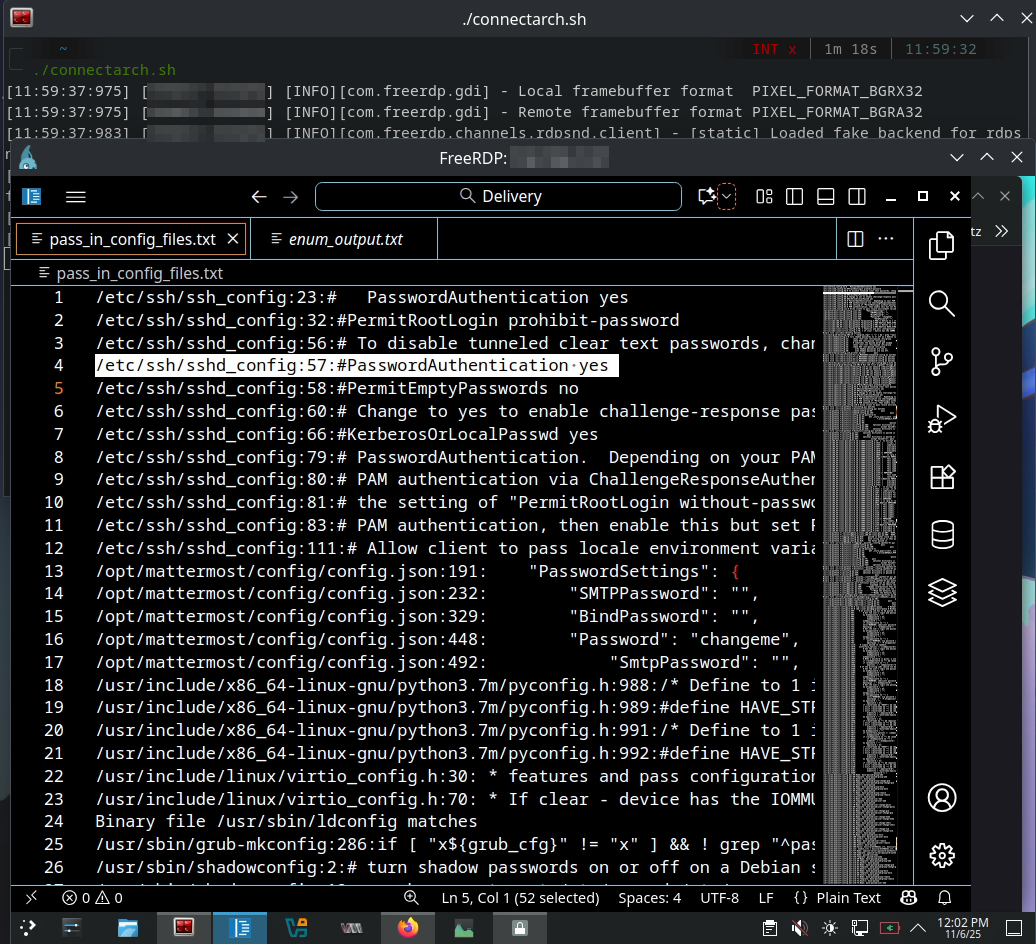
We can then connect to it with the following command (you need to have installed the freerdp2 package first):
xfreerdp /v:172.16.1.2 /u:<username> /p:<password> /cert:ignore /kbd:French +clipboard +dynamic-resolution +auto-reconnect
I recommend storing your password in a secure file and using it like this:
echo 'password=<yourpassword>' > password.txt

chmod 400 password.txt

chown root:root password.txt

xfreerdp /v:172.16.1.2 /u:<username> /p:$(sudo grep password password.txt | cut -d '=' -f2) /cert:ignore /kbd:French +clipboard +dynamic-resolution +auto-reconnect
This way there’s no need to enter the password directly in the command, however the password is therefore stored in clear text in a file (even if it’s protected). It’s also surely possible to configure the software to be required to enter the password on an authentication page but that takes more time and to lighten my work environment I decided to do it this way.
We note of course the option for the French keyboard, I’ve always had trouble with that, sometimes it works sometimes not, sometimes you have to add other configurations elsewhere etc.
And there you have it, I put the window in full screen on my external screen and I can now go wild in my CTFs!
Conclusion Link to heading
And there’s the whole journey to creating this setup! It took time and was done incrementally, you shouldn’t imagine that everything is perfect from the start ;)
One thing that I find truly amazing with this setup is that I can launch a command or a program whenever I’m in a session, and the program won’t quit when I stop the session. I can therefore launch big nmap scans, cut the connection, go do something else and come back to find the nmap scan completed!
Since I’ve had this setup, I’ve tried several times to use other protocols like SSH with X11 forwarding for the image, VNC with tigervnc, x2go and others still. But I’ve never had the same quality as now unfortunately, and that’s why I stayed with RDP.
I still have a few things that irritate me: when I press the Windows key, I have the menu that opens on my base computer and on my lab and it forces me to click. I also observe weird behavior with capital letters that forces me to type the “caps lock” key twice for it to activate or deactivate in my RDP session. Copy paste doesn’t work with images and not super well all the time either, so I often have to spam the C key when I do ctrl+C to be sure it works. I suppose one day I’ll find the motivation to solve these little annoyances, or else one day I’ll completely change my setup and I’ll have other problems! x)